PULL API: Integration with Informa Asia OEM
This guide walks you through setting up the PULL API Integration with Informa Asia OEM, in partnership with Jublia.
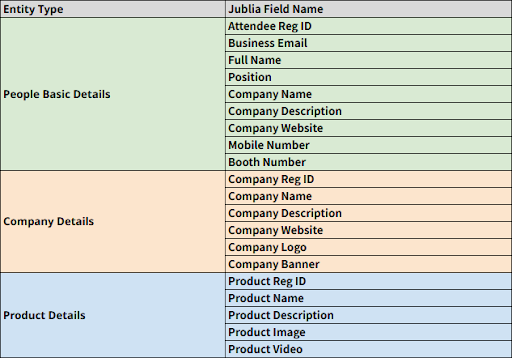
With this integration, exhibitor, company, and product data can be seamlessly synchronized through the BASE Integration with Informa Asia OEM.
Important Notes:
If there are any customizations to the pulling process or custom fields, please contact your event’s Tech Success Manager for assistance. Refer to the Custom Integration section below.
If an event involves multiple endpoints for the pull process, you can configure separate API Connectors to match each endpoint.
Custom Integration
Some BASE Integrations do not support custom requirements and may need additional development. Below are examples of custom integration possibilities with Informa Asia OEM:
Brands attribute
Concatenating multiple Informa OEM fields into a single Brands attribute on the Jublia side:
Brand Name
Brand Country
Brand Description
Brand Image
Host Product Image on the Jublia server
With this custom, all the product images will be hosted on the Jublia server, which will lead to seamless product image loading on the Jublia platform.
Special Hall Recommendation
Custom feature for large-scale events: Recommends timeslots based on required travel time between meeting venues.
Notes:
All custom integration items incur an additional cost. Contact your event’s Solution Specialist for detailed pricing.
How to Set Up Informa PULL API Integration
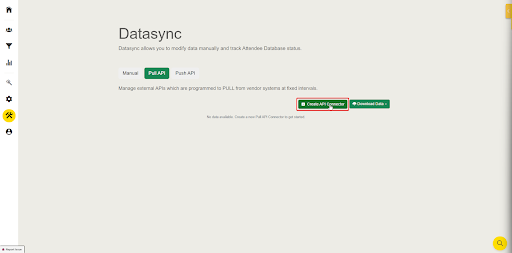
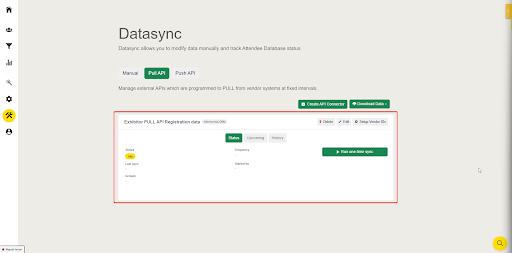
Step 1: Accessing the Datasync Section
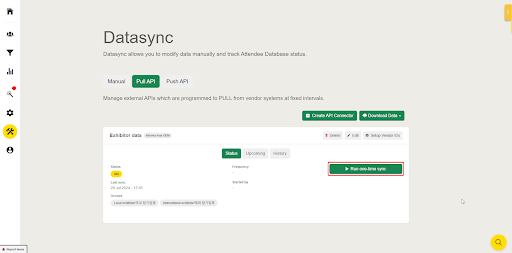
Go to Tools > Datasync > Pull API tab
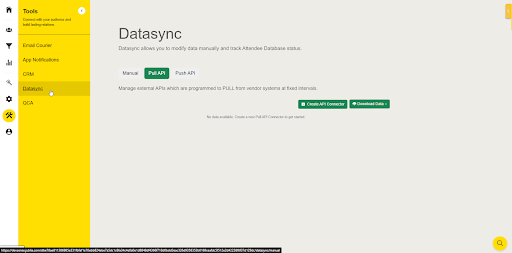
Step 2: Create API Connector
Click Create API Connector
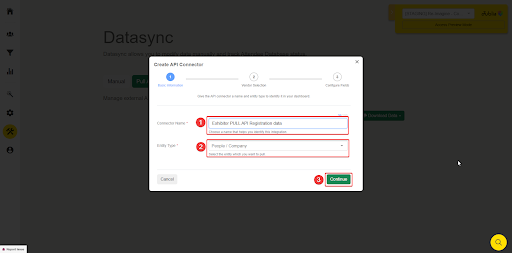
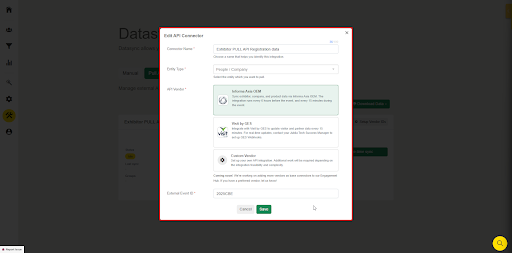
Setup the Basic Information for the API Connector
Connector Name
Entity Type.
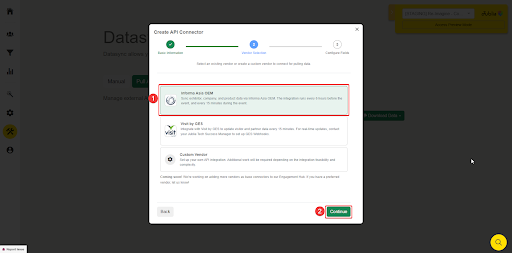
In the Vendor selection phase, select Informa Asia OEM.
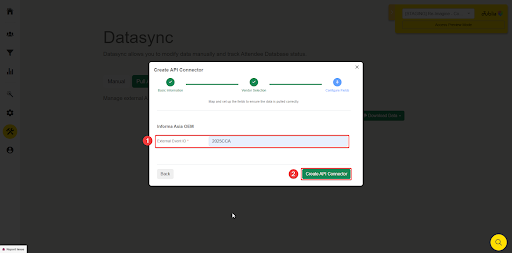
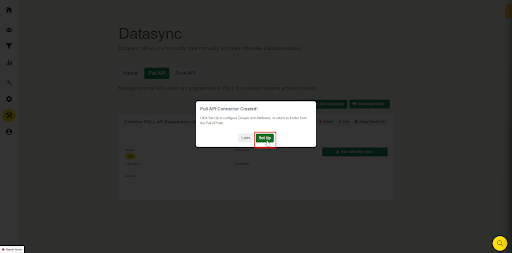
Enter the External Event ID for your event, then create the API Connector.
Example: 2025CCA, 2025BIFA
(Note: External Event ID information can be acquired from your Informa Asia OEM PIC.)
Once the Pull API Connector is created, you can continue to configure Groups and Attributes, or return to it later from the Pull API tab.
Step 3: Set up Group and Attribute
Refer to this article for instructions on setting up the Groups and Attributes for the PULL API.
Step 4: Sync your data and check the results
After completing the setup for the API Connector, Groups, and Attributes, you can start syncing your data by clicking the “Run one-time sync” button.
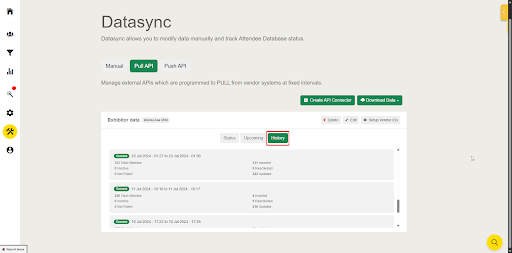
After the pull process is complete, view the results by clicking the History tab.
Note: If you encounter any errors while pulling data, contact your event’s Tech Success Manager for assistance.
How to Edit your API Connector
After creating the PULL API Connector, you can still modify or update certain details. Follow the steps below to make the changes.
Step 1: Accessing the Pull API Connector
Go to Tools > Datasync > Pull API tab

Step 2: Edit API Connector
Click the Edit button on the API Connector card

Edit and update the necessary information, and click Save.
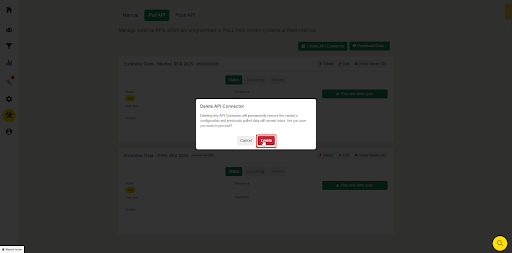
How to Delete your API Connector
Step 1: Accessing the Pull API Connector
Go to Tools > Datasync > Pull API tab
Step 2: Delete API Connector
Click the Delete button on the API Connector card
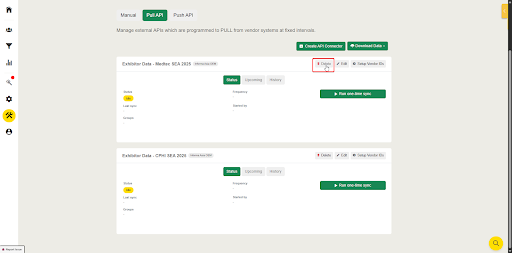
Confirm by clicking Delete